Thursday 6 November 2014

Happy Gustavus Adolphus Day !

Today, is a very special day, for it is Gustavus Adolphus Day. The commemoration for arguably one of the greatest generals in history. And for this reason, I have decided to do a short (informal) post to celebrate the great King of Sweden (and yes he is one of my heroes, despite that I am English). The day, on the 6th November, is also on the date when he died at the Battle of Lützen in 1632 during the Thirty Years War. Often called 'the Lion of the North' he transformed Sweden into one of the greatest powers in Europe. Not only did he aid the Protestant cause in the Thirty Year's War, he also lead successful wars against enemies such as the Polish-Lithuanian Commonwealth and Russia (Obviously, you can debate his motives, which like anybodies are never fully clear). He has been quoted as the 'Father of modern warfare', as was admired and studied by commanders such as Napoleon Bonaparte and Carl von Clausewitz. Yet, he also increased the efficiency of the administrative system in Sweden and also encouraged education, including in conquered territories, such as Estonia.


 Gustavus Adolphus Day is celebrated on the 6th November, despite him dying on the 16th November, according to the Gregorian Calendar, this is because the Julian calender was still in use in Sweden when he died. The day has been celebrated since the early 19th Century and became especially popular in 1832, the 200th anniversary of his death. Today, it is still popular in Gothenburg, which he founded, while it also still celebrated in Estonia and Finland. In Sweden and Finland it is an official Flag Day. Despite, being celebrated in the past with torchlight processions and patriotic speeches, mainly today it is celebrated with the Gustavus Adolphus Pastry.


Although, the recipes vary locally, they nearly always have a chocolate or marzipan portrait of the King on. Candy with the image of the King on was sold in the 1850s in a Konditorei, with the earliest mention of the pastry in western Sweden in the 1890s. The pastry may have been created around the festivities of when a statue of Gustavus was erected in Gothenburg, at this time, in the square now known as Gustav Adolfs Torg (Gustavus Adolphus Square). One bakery in Gothenburg claims to have created in the early 20th century, with the years 1905 or 1909 being mentioned. Now for a final celebration, lets role on the pictures of some pastries (all credit to those who made them and/ or who took the photos.)


Yummy !

Image Credit goes to:

Wikipedia
http://swedenroots.blogspot.co.uk/2012/11/gustav-adolfsdagen.html
http://lettersfromgothenburg.wordpress.com/2011/11/06/gustavus-adolphus-day/
https://www.flickr.com/photos/malter/5152145216/

Tuesday 16 September 2014

The Last of the Samurai : The Satsuma Rebellion Against the Meiji Government

The Meiji restoration in 1868 had restored the practical rule of the Emperor of Japan, after centuries of practical power being in the hands of the Shogun, a military governor. The Satsuma clan was based on the southern region of the island of Kyushu and although it had was a key player in the Meiji restoration and the Boshin War and many men from Satsuma had risen to influential positions in the new government, after nine years of working close to the central government, the samurai of Satsuma were growing dissatisfied with the direction the government was taken. Although there were quite a few reasons for this dissatisfaction, the process of westernisation of Japan since the restoration of the Emperor had not only upset the samurai's privileged status, but it had also resulted in a rapid change in Japanese culture. Saigo Takamori, who would be the leader of the Satsuma Rebellion, was particularly worried about the political corruption, after all he had supported the reforms of the Meiji government in the first place, he had even helped to create the imperial army he would face.

                                                                   Saigo Takamori

As mentioned, Saigo was at first a supporter of the Meiji government, but the field marshal resigned into retirement a while after an incident regarding Korea, which had refused to recognise the authority of Emperor Meiji. Saigo had been a proponent of war against Korea, even to a degree that he agreed to go to Korea himself in 1873 so the government would gain a plausible excuse to go to war. To gain this casus belli he agreed to insult the Korean government to such a degree, that they would have to kill him, which would indeed provide the Japanese with an excuse to wage war on Korea. However, Saigo was already on a boat heading to Korea, when the government recalled him, reconsidering their agreement.with Saigo. Yet, Saigo and his fellow conservatives still tried to push for war and a samurai-bases army. However, the peace party got the upper hands in the imperial councils and therefore in protest Saigo and his party resigned in protest. This causes to voluntarily retire and return to his home city of Kagoshima. Even personal appeals from his friend Shimpei Eto who led 2,000 Kyushu samurai in revolt in 1874, failed to move him. This rebellion was soon crushed and Eto subsequently beheaded.

A large number of imperial guardsmen had resigned with Saigo and they later went to Kagoshima. Here, Saigo employed and supported these men by starting a series of 132 private schools or shigakko. These were scattered throughout Satsuma. These schools centred on Chinese classics, but English and French were also taught. However, all students were required to take weapons training and learning in tactics. Saigo also started an artillery school. Emphasis was indeed put on the ways of the Satsuma samurai and students were also taught the Bushido Code, the samurai's ancient chivalric code.

The martial nature of these schools worried Tokyo. In the later days of the Tokugawa Shogunate, just before the Meiji restoration , the Satsuma clan had begin to heavily invest in armaments, for this reason there was considerable weaponry stockpiled in armouries throughout the province. Worried about some of the best warriors in Japan rising up, on the 30th January 1877 a government sent ship arrived in Kagoshima. Without, explanation it began to remove munitions. Outraged by this 50 students attacked the Somuta arsenal, trying to carry off arms. Over the next 3 days, over 1000 students carried out raids on the naval yards and the Iso arsenal, stealing 84,000 rounds of ammunition. The officer who was in charge of the removal of arms lodged a formal complaint with the provincial government. The police however said they were unable to find even one of the raiders, despite them parading with their trophies throughout the streets. The officer gave up in disgust and ordered the ship to leave Kagoshima. Therefore, the students seized the arms factories and hired more men, going into full production. Saigo was absent hunting while these events happened, when he learned of what had happened he was in rage against the student leaders. Despite, this the act had been committed and he later congratulated his students.

                                                         The Clash at Kagoshima

Between February the 3rd and the 7th, the provincial government of Satsuma arrested 58 government agents, several of them were Satsuma born Tokyo policemen, so they could speak and understand the local dialect, making them perfect for spies. Even today the dialect of Satsuma is unintelligible to outsiders. Soon after the arrests, rumours broke out that several of the suspected spies had confessed to being sent by the government to assassinate Saigo and stir up insurrection as an excuse to invade. Therefore, his students began to press for war, but Saigo over his subordinates objections decided to go to Tokyo to negotiate. Saigo was opposed to taking an armed bodyguard with him, relying on his status as an imperial marshal for his protection. However, an advanced body of samurai had already departed for Tokyo, without Saigo's knowledge. The rebels knew that Saigo was too much of a traditionalist to abandon his samurai in a time of crisis and they knew he would be morally obligated to command them.

Despite, this Saigo still tried to avoid war, rejecting large numbers of volunteers and departing with only 12,000 volunteers. Saigo made no attempt to contact other hans (domains) for support and also left Kagoshima unprotected. Saigo only took 25,000 yen from his warchest, sufficient enough for only a month's supplies. Saigo also wore his army uniform to help in projecting an heir of legality. On the 17th September Saigo departed with his rearguard, while the main portion of his army had departed the day before.

Two days earlier, Taketa Tani commander of Kumamoto Castle had received a letter orr two, the first most likely written by some students wanting war and the second written by Saigo asking to pass peacefully. This is indeed a mystery in itself. Regardless, of what the commander of Kumamoto Castle actually received, he did not intend to let them pass. Tani had an army of 3,800 and 600 policemen at his disposal (the policemen not to be underestimated as they were picked from the samurai class and it would do well to mention the point that mostly they did not use firearms, relying on swords and martial arts skills.) by the 21st of February. However, Tani acted defensively, as most of the garrison was from Kyushu and some were from Kagoshima, itself and he did not want to risk defection or desertion. Tani gathered supplies in the castle and also destroyed several hundred houses around the castle to provide fields of fire. The Siege of Kunamoto Castle was bloody and ferocious. On the 21 February advanced imperial guard were forced back into Kunamoto Castle and by 22nd of February the castle was surrounded. And so it began......

Saigo had 9,000 samurai at the moment. After the surrounding of the castle and the keeping up of small-arms fire all day, a series of poorly coordinated attacks were launched on the walls. Despite, being repulsed by concentrated fire, for two days ferocious, almost suicidal attacks were launched upon the walls. But soon the enthusiasm of the besiegers drained. 3,000 men dug into the rock icy ground around the castle and tried to starve the garrison out. However, a detachment of the besiegers sent to block the passes of the town soon encountered forward elements of the imperial relief force. After several sharp clashes, the forces disengaged on the 26th of February.

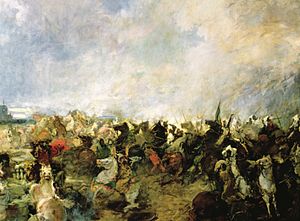
 The fighting resumed on March 3rd, however both sides had been reinforced and numbered around 10,000. Although, officially the imperial army was controlled by Prince Taruhito Arisugawa, it was effectively under the command of General Aritomo Yamagata, an old friend of Saigo. Yamata ordered a frontal assault on the Satsuma positions on March 4th, this became the 8 day-long battle of Tabaruzuka.

                                              Two scenes from The Battle of Tabarazuka

Both sides were dug in and so a fierce war of position became apparent. There was little shooting and most attacks were made with cold steel. Both sides had lost around 4,000 by the time the rebels were dislodged.  At the height of this battle it is clear that Saigo was not committed to the rebellion and sought a peaceful rebellion. In a letter to the prince he wrote why he had been heading to Tokyo. The government however refused to negotiate.

In order to cut Saigo off from his base in Kagoshima a group of three ships bearing 500 policemen and several detachments of infantry arrived at Kagoshima on March 8th. After landing they took control of the arsenals and took the provincial governor into custody. During the stalemate at Tabarazuka, Yamagata decided to land a detachment behind the rebels, so they could be hit upon their rear. Although these reinforcements received some opposition, when the imperial army received them, its number was 4,000. The rear of the Satsuma army was attacked and pushed into the main part of the Satsuma army.

Although fighting continued on for a while, it later became clear that the Battle of Tabarazuka had been lost. After the failure to take Kunamoto Castle , Saigo led his men on a 7 day march to Hitoyoshi. Morale was low and Saigo ordered that any desertion would or abandoning of weapons would lead to suicide. Without a definite plan, the rebels dug in and waited for the imperial forces. However, the rebellion had been costly for the imperial forces and so it was forced to suspend operations for a few weeks. During this suspension one of Saigo's men slipped into Kagoshima and managed to raise a force of 1,500 samurai. The garrison was reinforced on May 4th to prevent a recurrence of such an event. It was not long the imperial forces restarted their offensives and Saigo was forced to retreat to Miyazaki. Saigo had left numerous groups of samurai in the hills to conduct guerilla warfare. On July 24 here the imperial army launched an offensive upon Saigo's army in Miyakonojo. Retreating from their enemy, the army next made a stand in a city north of here Nobeoka.

Yamagata landing forces to the north of Saigo at Oita and Saiki, was once more able to encircle Saigo. The rebels proved too strong and Saigo and his men, concentrating on one point, managed to cut their way free. The battle of Nobeoka had been so fierce the imperial army was forced to assign a task to some men to make sure floating bodies did not foul a pontoon bridge, over which supply lines passed. Captain John Capen Hubbard, an American sea captain in service of the Mitsubishi company happened to be in the area soon after the battle and in a letter to his wife he mentioned that most of the bodies were of the rebels.

Yet, the rebels had not given up, by August 17th they had been reduced to 3,000 effectives and almost all of their modern firearms had been lost (though they still had less modern ones). On the slopes of Mount Enodake they made a stand. The samurai had their backs towards the wall and were outnumbered 7-1 and many numbers of samurai surrendered. However, to some this was unacceptable and the only alternative was a glorious death. However, the slopes of Mount Enodake were not to Saigo's likening for a final resting place and so he decided to try to break for Kagoshima through the ring of steel. On  the evening of August 19th Saigo departed, burning his private papers and his uniform. His army abandoned the sick and wounded and marched to the misty summit where the imperial cordon was weakest. Saigo had to be carried in a special litter as he was suffering from hydrocele. The rebel army under the cover of the mist managed to slip through, dispatching the few guards that were there ( quite ironic as Yamagata had been determined to prevent such a thing.)

Yamagata had no idea in in terms of what direction Saigo had went and so he sent out patrols in all directions. After eight days of marching, Saigo found his path blocked by a patrol. Saigo's men halted and faced them all day, when night came their army was divided into two. Then they slipped around the flanks of the patrol and therefore they had escaped yet again. On September, 1st the remaining 500 rebels slipped into Kagoshima, eluding government patrols in heavy rain, taking a few pieces of artillery from the private schools and some food from the local peasants. They took possession of Shiroyama ('Castle Mountain') where they would make their final stand.


              The final battle scene of the 2003 film The Last Samurai is very reminiscent of the Battle of Shiroyama and is likely an interpretation of the battle. The film itself is mostly based off the Satsuma Rebellion.

The government forces arrived soon after. While there was only 500 samurai there were 30,000 imperial troops. Saigo's men were outnumbered by 60-1. However, due to being outmanoeuvred and outfought so many times Yamagata was determined as ever, probably even more than before, to make this the final battle. Therefore, the imperial force spent several days constructing an elaborate system of ditches, walls and obstacles, in order to prevent another breakout. Although, Yamagata already had extensive artillery, five government warships in the harbour of Kagoshima added to the imperial firepower. The artillery began to systematically reduce the rebel's position, over 7,000 shells were used and even so the Imperial forces had enough 7,000 reserve if they needed them. The situation was much more dire for Saigo. His men were down to melting smuggled statuettes and casting them into bullets, these statuettes were smuggled in by locals. Saigo's medical equipment consisted of one carpenter's saw for amputations and a few rags for bandages. The only shelters were shallow holes scraped in the hillside, During the final days of the siege, Saigo lived in a hole, 6 feet deep and 3 feet wide. 


                                             Imperial Fortifications around Shiroyama

Yamagata's battle plan was to assault the samurai position on all sides at once. A special unit, was ordered to seize the area between Somuta and a private school and occupy Iwasakiguchi, thus Shiroyama would be split in two. Yamagata ordered every man to hold their position at all costs, they were forbidden to help any other units. If a unit retreated with enemies in pursuit, the neighbouring units were to fire into the area indiscriminately, killing their own men if necessary. This was mostly to prevent Saigo from escaping.

Two of Saigo's officers approached the imperial army with a white flag, in hope of finding a way to save him. The officers were disgusted as they felt like they were being treated as deserters. Yamagata gave them a letter to take to Saigo to tell them to surrender, in the friendliest terms and to end the senseless slaughter. Saigo read the letter carefully and yet his resolve was unshaken. The war had been bloody, costing the imperial force 6,000 men in terms of those killed and 10,000 wounded. The much smaller force of Saigo had lost 7,000 men in terms of those killed and 11,000 wounded. Much blood had been spilled, but honour prevented Saigo from surrendering and so Saigo spent his last night in a sake party.

                                                  \        The Battle of Shiroyama

For most of the night of September 21st there was an intensive artillery bombardment. At 3am in the morning imperial forces stormed the mountain. In a few minutes the once organised imperial line went into discord. The swordsmanship of the Samurai was superior against the army with little traditional training. Although, Saigo's line held for a while, his men were pushed back by the force of numbers. By 6am there were only 40 rebels left. As he was being carried towards Iwasakiguchi, Saigo was wounded in the thigh and stomach. Losing blood rapidly, Saigo selected a suitable spot to die. One of Saigo's most loyal followers Shinsuke Beppu carried him further down the hill on his shoulders. Then Saigo kneeling on the ground had Beppu cut off his head with a single strike. A servant hid the head in order to prevent it from falling into enemy hands. However, other evidence contradicts this, suggesting that Saigo died of the bullet wound and Beppu cut off his head to preserve his dignity. Then Beppu and the last of the samurai drew their swords and charged downhill towards the enemy positions until each one of them was mowed down. And so ended the Satsuma Rebellion.

At 7am the rebellion was over and yet we can still see the Satsuma Rebelion as a transition point in the history of Japan. It marked the final move from a feudal system to a 'modernised' and 'westernised' system. It was the first challenge for the Imperial army that would prove such a threat later and also later prove a humiliation for some of the European powers and the USA. Saigo's strength of convictions and integrity left a lasting impression on the people and government he fought. Later, the government removed his brand as a traitor and made his son a marquess. Saigo Takamori was later honoured by a statue in Tokyo's Ueno Par. Although, Saigo was one of the last of his kind, he still had a profound impact not only on Japan's history, but also the World's history.

Image Credit goes to Wikipedia, Pininterest and:

https://inhermajestysname.files.wordpress.com/2014/05/tls-1.jpg
myplex.tv

I do not claim copyright and ownership to any of these images.

Sources:
"Satsuma Rebellion: Satsuma Clan Samurai Against the Imperial Japanese Army." History Net Where History Comes Alive World US History Online Satsuma Rebellion Satsuma Clan Samurai Against the Imperial Japanese Army Comments. N.p., n.d. Web. 16 Sept. 2014.
"The Satsuma Rebellion." About. N.p., n.d. Web. 16 Sept. 2014.
"Satsuma Rebellion - Meiji Period." Satsuma Rebellion - Meiji Period. N.p., n.d. Web. 16 Sept. 2014.


Monday 18 August 2014

Margaret I and the Formation of the Kalmar Union

Although, Margaret I was never technically monarch of Denmark, Norway and Sweden (except, in regards to Sweden through her marriage to King Haakon VI of Norway), she was indeed highly influential in the history of Scandinavia. During her reign more unity would be brought about, with Denmark, Norway and Sweden (with Finland as part of the Kingdom of Sweden) and also the overseas territories of Norway (at this time including the Faroe Islands, Iceland and Greenland) being part of the Kalmar Union, along with there being more peace and stability in general. This post shall look at how the dynastic relations lead to this situation of unity, in terms of the Scandinavian kingdoms.

Born in 1353, at the age of 6 she was betrothed to the 18 year-old Haakon VI of Norway, son of King Magnus Eriksson of Sweden (Haakon had previously  ruled Norway as co-ruler with his father, but now he was sole King) . One intention of this marriage was to counter the threats of the Dukes of Mecklenburg's claims to the Scandinavian thrones. Although, the marriage was briefly imperilled by a renewal in the conflict between her father, King Valdemar IV and Magnus of Sweden in 1360, the danger was over when Magnus was forced to end hostilities due to the lack of support from the nobility and also military reverses. In the same year that these hostilities ended, 1363, the marriage went ahead at Copenhagen. Even so, a greater problem emerged for Magnus, that of Albert of Mecklenburg, who defeated him and his son and became King of Sweden in 1364, ruling until 1389. Despite, this Haakon managed to remain as King of Norway, which is where Margaret would grow up, tutored by a daughter of the Swedish St Bridget, Märta Ulfsdotter. Margaret displayed her skill at wielding power at an early age, apparently outshining her husband. Margaret and Haakon had only one son, Olaf, who was born in 1370.

                                                      Margaret I of Denmark

However, in 1375, Margaret's father, Valdemar died, leading to Olaf being elected to succeed him, against the objections of the Mecklenburgian claimants. Albrecht, the son of Margaret's late sister, Ingeborg, also a relative of Albrecht of Mecklenburg, had been chosen by Valdemar to succeed him, but Margaret had managed to persuade the nobility to elect her son. Margaret ruled Denmark as regent in her son's name and when in 1380 Haakon died, she also ruled Norway in Olaf's name. This union of the crowns of Norway and Denmark would last until 1814. In 1385 she won back economically important strongholds from the Hanseatic League on the west coast of Scandia and for some time she able to safeguard Denmark's southern borders with an agreement with the counts of Holstein.

Olaf came of age in 1185, and so Margaret was no longer regent, although she still closely advised him. However, in 1185 Olaf unexpectedly died. Margaret was named 'all powerful lady and mistress and the Kingdom of Denmark's Regent," and  in the year after she was named Norway's 'reigning' Queen. In the absence of an heir, she adopted six-year old Erik of Pomerania (changed to the more Scandinavian 'Erik' from his birth name Bogislav), who was the grandson of her late sister Ingeborg (also, grandson of Henry of Mecklenburg), with Margaret I still being regent. Margaret then joined up with Swedish rebels rising against Albert, who were rebelling over the disposation of the lands of the powerful chancellor, Bo Jonsson Grip. By the Treaty of Dalaborg of 1388, Margaret was named “sovereign lady and rightful ruler” and was granted the main portion of the former chancellor's lands. Defeating Albert in 1389, Margaret took him prisoner and only released him with the conclusion of peace, in six-years time. His allies, who had allied themselves with  pirates in the Baltic sea , only surrendered Stockholm in 1398.

Margaret had became the undisputed ruler of all of Scandinavia, with Erik being proclaimed hereditary King of Norway in 1389 and his election as King of Denmark and Sweden in 1396. Erik was crowned in 1397 as King of all three countries, which would be in a 'eternal' union at Kalmar, a southern Swedish town. Despite, this the document was not actually ratified in the three kingdoms. Also, at Kalmar, the nobility displayed increasing concern of absolute power. Even though Erik was crowned at Kalmar and was aged 15, Margaret remained de facto ruler until her death. 

                                       The Kalmar Union (not including Greenland)

In 1402, Margaret arranged the marriage of Erik to Phillipa daughter of Henry IV of England. The English King also urged the idea that Erik's sister should be married to the future King Henry V of England to bring them into an alliance against France in the Hundred Year's War, but Margaret preferred to keep the Scandinavians out of the conflict. At around the same time as the marriage negotiations a young man in Poland was thought by some to be Olaf, Margaret's dead son. Margaret offered to interview him, stating that if he was her son, she would accept him. However, he could not speak Danish and admitted he was a peasant from Prussia. He was burned at the stake, wearing a mock crown, for what was considered an attack on the monarch. Margaret I unexpectedly died in 1412, at which time there was an armed conflict with Holstein.

Erik ruled until  in Denmark and Sweden until he was deposed in 1439 and in Norway until he was deposed the next year, despite this he continued to rule in Pomerania. The term 'Kalmar Union' would not have been recognised by people at the time and though the union wholly collapsed in 1523 ,when Gustav I Vasa of Sweden officially declared independence, the union was not completely continuous, with frequent breaks during its existence.

Bibliography:

Norman, Lennart T. "Margaret I (queen of Denmark, Norway, and Sweden)." Encyclopedia Britannica Online. Encyclopedia Britannica, n.d. Web. 18 Aug. 2014.

"Margaret of Denmark - Medieval Ruler of Denmark, Norway and Sweden." About.com Women's History. N.p., n.d. Web. 18 Aug. 2014.

"Margaret, Queen of Denmark, Norway, and Sweden." Margaret, Queen of Denmark, Norway, and Sweden. N.p., n.d. Web. 18 Aug. 2014.

"The Kalmar Union." The Kalmar Union. N.p., n.d. Web. 18 Aug. 2014.

Image credit goes to Wikipedia

Thursday 17 July 2014

Historical Book Review : Aspects of the Crusades by J.J Saunders

As I enjoy reading History books, I thought it would be a good idea to start to review some of the books I have read. The first book I shall review is J.J Saunders' Aspects of the Crusades. 


.

Introduction

Essentially, the book is a collection of essays regarding, as the title suggests, various aspects of the crusades, many of these aspects not frequently covered and so an interesting read is created. However, it is also short at only 80 pages, with around 60 of these being part of the main content and over 10 of these being notes. Saunders makes a point in the book itself that it is not just from a Western viewpoint and takes into account material regarding the Arab point of view. In order to display the wide range of topics covered to a worthy level, I shall list the chapters below:


  1. The Literature of the Crusades
  2. The Idea of a Holy War
  3. The Role of the Assassins
  4. The Significance of Egypt
  5. The Armenian Ally
  6. The Franks and the Mongols
  7. The Passing of the Near Eastern Civilisation
Positives

Many of the topics covered are interesting, but also it is often difficult to find information on these topics and so the book is indeed enlightening in rarely covered areas. For the common reader, it may be difficult to find material anywhere else in such detail on these 'aspects' and so if you have a particular interest in several or perhaps one of these topics I would strongly recommend it. The book is also highly readable and should not be difficult to swallow, although a basic knowledge of the Crusades is probably required due to the specific nature of the essays. My favourite essays were probably, the ones relating to Egypt, the Assassins, the Armenians and The Franks and the Mongols. In particular, the chapter on the Armenians was very insightful. I must profess that I discovered this book through a sample chapter on the significance of Egypt, which was most helpful  for writing an essay for my AS History course. This sample is legitimately available at http://web.archive.org/web/20110605033053/http://www.deremilitari.org/resources/pdfs/saunders.pdf , as you may have inferred it was this sample that also encouraged me to purchase the full book. I will not spoil the sample chapter's theory on Egypt, as you will be amazed by how significant Egypt was in terms of the Crusades.

Negatives
 
Alas, as with any book some parts do not match the greatness of others, though in this instance I suggest it is down to personal opinion. Although, some of the other chapters are indeed good, they are not as interesting as the others. As I have mentioned this no fault of the author, it is just down to my personal tastes. For some reason, when I bought the book ( having looked at the essay titles beforehand) I thought the essay on The Literature of the Crusades would be somewhat different for some reason ( possibly just expecting information on fiction, such as poetry).

Conclusion

I would thoroughly recommend this book, but I should note that it is not the simplest book to receive. I personally, bought it on AbeBooks and I would suggest it would be very hard if not impossible to gain a new copy of the book. As you may have noticed the image of the book is not to a great standard for a review, this is due to the difficulty of finding an image of the book on the internet. You should also consider that you are buying a very short book, that will probably be second hand, for a price which is quite hefty for the quanitity. In this instance, I would suggest that it is quality not quantity that matters and if you are really interested in purchasing the book, then you should buy it. However, look around for the best price, it was quite a lot cheaper on AbeBooks compared to Amazon, despite both offering only used copies.

Obscure But Important Battles: From Guadalete to Khalkhin Gol

History is full of famous battles, such as Hastings, Waterloo and Poltava, all of importance. However, there are also many battles that are of similar significance that are nowhere near as well known. This post aims to introduce a few of these battles and provoke interest and further research into the battles. By no means will the detail in this post be comprehensive, as the post aims to briefly describe these battles and the impact that they had. Also, the Battle of Ain Jalut, one of the many obscure but important battles, has not been mentioned as it may have a post by itself.

The Battle of Guadalete


The Battle of Guadalete was fought between Christian Visigoths and an invading force of Muslim Arabs and Berbers on the southern shore of the Iberian Peninsular in 711 AD.  The Visigothic King of Hispania, Roderic was informed of the attack, while he was fighting the Basques, forcing him to march south. Although numbers for the battle vastly differ, one suggestion is that there 33,000 on the Visigothic side and 12,000 on the side of the Umayyads  (Lewis suggests this). The Muslims carried out hit and run attacks while the Visigoths moved en masses (in one body). A cavalry wing that had pledged to betray Roderic did and stood aside, allowing the Muslim cavalry to exploit the break. The Visigoth army was eventually routed and King Roderic was slain. Following this much of Iberia fell under the control of Muslims, with Islam only finally being driven out of Iberia with the end of the Reconquista and the Fall of Granada in 1492, over 780 years later.


The Battle of Molodi


The Battle of Molodi was fought in 1572  between a Russian army and the Crimean Khanate, a vassal of the Ottoman Empire. The Russians had an army of around 60,000-70,000 men led by Prince Mikhail Vorotynsky against an army of about 120,000 lead by Khan Devlet I Giray. The battle was a resounding success for the Russians, as the horde was defeated so badly that the Sultan and the Khan gave up any hope of expanding upwards into Russia, thus preventing Ottoman or Crimean expansion northwards and possibly saving Russia as a whole. The map is of the Crimean Khanate in 1600, after the battle took place.

The Battle of Blenheim


The Battle of Blenheim was a pivotal battle of the War of the Spanish Succession, with the French and Bavarians fighting against multiple forces including those of the Emperor, England and the United Provinces in the year of 1704.Louis XIV had hoped to knock Emperor Leopold out of the war by seizing Vienna and therefore leading to a favourable peace settlement. The defeat of the French was of much importance, ending Louis XIV's hope for a quick victory, maintaining the Grand Alliance and putting Bavaria out of the war. As a turning point in the war, one could argue that if the battle had gone the other way, the Bourbons may have won the war and therefore a French-Spanish nation or union could have been eventually formed.

The Battle of Warsaw


The Battle of Warsaw of 1920, although not part of World War I and World War 2, is still probably one of the most important battles of the 20th century. When Soviet forces invaded Poland in 1920, the Polish army disorderly retreated westwards, with their forces on the verge of disintegration. As Soviet forces approached Warsaw and the nearby Modin Fortress, a Polish counter-attack lead by Józef Piłsudski, disrupted the Soviet offensive and forced them to retreat eastward, in a disorganised manner, across the Neman River. The battle had huge implications, if the Bolsheviks had successfully taken Poland, a Germany weakened by WWI would have also been vulnerable to a Soviet attack and therefore the installation of a Marxist system. This may have eventually resulted in Marxist governments throughout Central and Western Europe, obviously vastly affecting events, such as the possibility of a different or even no World War 2.

The Battle of Khalkhin Gol


The Battle of Khalkin Gol was fought in August 1939, weeks before the start of WW2 and it was fought by the Soviet Union and the People's Republic of Mongolia against the Empire of Japan. It was part of the undeclared Soviet-Japanese border conflicts, which were the result of the Japanese occupations of Korea and Manchuria. After the occupations, the Japanese turned their attention north leading to these conflicts. The battle, a Japanese defeat helped to prevent any further expansion north, dictating policy for WW2. It may also have played a factor in Japanese expansion in the Pacific, as expansion north-west no longer seemed to be an option. The battle was also the first victory for the soon-to-be famous General Georgy Zhukov, winning him his first of four Hero of the Soviet Union awards.

Bibliography:

"Major Battles." Islamic Spain. N.p., n.d. Web. 17 July 2014. <http://www.islamicspain.tv/Andalusi-Society/Major-Battles.htm>.

"Молодинская битва." Молодинская битва. N.p., n.d. Web. 17 July 2014. <http://www.hrono.ru/sobyt/1500sob/1572molod.php>.

The Editors of Encyclopædia Britannica. "Battle of Blenheim (European History)." Encyclopedia Britannica Online. Encyclopedia Britannica, n.d. Web. 17 July 2014. <http://www.britannica.com/EBchecked/topic/69261/Battle-of-Blenheim>.

"Polish-Soviet War: Battle of Warsaw." History Net Where History Comes Alive World US History Online PolishSoviet War Battle of Warsaw Comments. N.p., n.d. Web. 17 July 2014. <http://www.historynet.com/polish-soviet-war-battle-of-warsaw.htm>

"Khalkhin-Gol: The Forgotten Battle That Shaped WW2." History of Russia. N.p., n.d. Web. 17 July 2014. <http://historyofrussia.org/khalkhin-gol-battle-nomonhan/>.

Image Credit goes to Wikipedia


Friday 20 June 2014

The Battle of Lechfeld: Europe saved from the Hungarians

The Hungarian (or Magyar) invasions of Europe took place in the ninth and tenth centuries, at a time when Europe was experiencing attacks from not only the Magyars, but also the Vikings and the Arabs. The Magyar invasions had caused much devastation throughout Europe, reaching as far as the modern-day Spain. However , the Magyars power and raiding would be finally checked at the Battle of Lechfeld in August 955.

                                                       Magyar raids in the 10th century

In 936, Otto I was crowned King of the East Franks and Saxons, he considered himself as the successor to Charlemagne. But, in 1953 Otto's son Liudolf and Conrad, the son-in-law of Otto rebelled. The rebels asked for the help of the Magyars, who invaded Bavaria in 954, this campaign was a huge financial success for the Magyars and so another army tried to repeat it the next year. The Magyars established an encampment on the eastern side of the River Lech and several raiding parties set out to pillage the surrounding countryside. The Magyars also besieged the city of Augsburg, having an army of around 6000 to 8000 men. On August 8th 955, Berchtold, the Lord of Risinesburg warned the Magyars of Otto's approaching army of around 3500 men. The Magyars lifted the siege of Augsburg and prepared a plan based on a victory in 910 when the Magyars destroyed the army of Louis the Child at Lechfeld. However, the arrival of Conrad, the exiled Duke of Lotharingia, the son-in law of Otto, who had previously asked the Magyars for aid, to support Otto was heartening. Conrad would later lose his life during this conflict.

And so the battle began.The Hungarians crossed the river and immediately attacked the Bohemians and later the Swabian legions, but they later retreated after a short fight. When Otto learned of this attack, he ordered Conrad to recover the baggage train. Conrad succeeded and returned to the main army, this was when Otto decided it was time to attack the Hungarians. Otto's army smashed into the Magyar line, despite a volley of arrows being fired at them. Otto's army was able to engage the Hungarians in hand-to-hand combat, thus allowing no room for the nomads favoured shoot and run tactics.  Bulcsú, one of the Hungarian leaders, feigned a retreat, with part of his forces, in order to try and lure Otto's men into pursuit, so they would break their line. However, this failed and the Otto's men remained in formation and routed the Magyars. A pursuit of the Magyars followed for several days. On their return, the Hungarian Chieftains  Lél, Bulcsú and Sur were executed. Conrad was killed when he opened up his vest due to the summer heat, as a arrow struck his throat.


                       The Battle of Lechfeld as depicted in Sigmund Meisterlin's codex about the history of Nuremberg

The battle had several important outcomes, as it somewhat hindered Magyar dominance, helping to bring an end to almost 100 years of raids. After 955, the Magyars ceased all raids towards the West. However, its main significance probably lies in the German lords raising Otto in their shields, in the traditional Germanic manner and proclaiming emperor. A few years later, built on the strength on this, Otto travelled to Rome and had himself crowned Holy Roman Emperor by Pope John XII. The battle has also been viewed as a symbolic victory for knightly cavalry, which would define European warfare in the High Middle Ages, over the light, nomadic cavalry, which had characterised warfare in Central and Eastern Europe during the Early Middle Ages.

Bibliography:

"The Battle of Lechfeld." - All Empires. N.p., n.d. Web. 20 June 2014.

Cavendish, Richard. "The Battle of Lechfeld." History Today. N.p., n.d. Web. 20 June 2014.
Image credit goes to Wikipedia


,

Sunday 8 June 2014

Edgar the Atheling, Part 3: After the Struggle with William

Edgar the Atheling was now a subject of William the Conqueror and in 1081 he accompanied him on expedition into South Wales. However, in 1085, disappointed with respect and recompense he had received from William, Edgar asked the King for permission to leave for the Norman lands in southern Italy and Sicily, with a retinue of 200 knights. It is likely that this expedition was unsuccessful as Edgar returned to England within a few years. However, in 1087 William died and although Edgar attended William Rufus' coronation, Edgar supported Robert Curthose, the eldest son of William, in his dispute with William II. However, Robert Curthose's war ended in failure in 1091 and as part of the settlement between the brothers, Edgar was deprived of lands given to him by Edgar, presumably in Normandy. Edgar once again returned to Malcolm in Scotland who was preparing to wage war against Rufus. However, the two Kings decided to negotiate instead of fighting and Edgar represented Malcolm, while Curthose represented William, who he had been reconciled with. With the resulting agreement there was a reconciliation between Edgar and Rufus, however Robert Curthose soon left for Normandy, discontent with William's failure to fulfil the pact between them. Edgar the Atheling left with Curthose, but once again returned to England and in 1093 Edgar was sent on a diplomatic mission for William to negotiate with Malcolm. The King of Scotland was dissatisfied with William's failure to fulfil the terms agreed upon in 1091. However, the dispute lead to war, when Malcolm invaded Northumbria, he was killed at the Battle of Alnwick. Donald III succeeded Malcolm as King of Scotland, he drove out the English and French retainers who had grown powerful under Malcolm's reign (and so some of the local aristocracy was jealous of them). This lead Scotland into another conflict with the King of England. William helped Malcolm's eldest son Duncan gain the throne of Scotland, Duncan had spent many years as a prisoner of William's father, but when he gained freedom from William II  he decided to stay at William II's court. However, Donald soon regained the Scottish throne and Duncan was killed after only reigning for 7 months.
                                                                      Robert Curthose

In 1097, another expedition was sent to Scotland, with the interest of restoring Anglo-Norman influence once more, Edgar the Atheling lead the invading army, ousting Donald out as King of Scotland. Edgar, the nephew of Edgar the Atheling and son of Malcolm and Margaret was installed as King of Scotland. It is possible that Edgar the Atheling went on the First Crusade, after all Robert Curthose was one of the prominent figures on the First Crusade. However, it is unknown if Edgar was actually at any point with Robert on the crusade. Orderic tells that Edgar was the commander of a English fleet off the coast of Syria that was aiding the crusade, however this fleet is known to have arrived of the Syrian coast by March 1098, and had invaded Scotland in late 1097. This means it would have been almost impossible for Edgar to make the voyage in time, however Edgar could have joined the voyage on its way, in the Mediterranean. However, William of Malmesbury writes that Edgar went on pilgrimage to Jerusalem in 1102, so Orderic may have been confused with this later expedition. Some historians think Edgar may have served in the Varangian Guard of the Byzantine Empire at around this time, which was mainly composed of English exiles at this point, but evidence does not support this. Malmesbury states that when Edgar was on his way back from Jerusalem, he was given rich gifts by the Holy Roman and Byzantine Emperors, who offered him an honoured place at their courts. However, Edgar refused and returned back home.


                                               A 15th century potrayal of the Battle of Tinchebray

Edgar once again decided to take part in the internal struggles of the Norman dynasty, siding with Robert Curthose against Henry I of England (Curthose's youngest brother). However, Robert was defeated at the Battle of Tinchebray, resulting in him being imprisoned for the rest of his life. Edgar, however, was pardoned by Henry. His niece Edith (renamed Matilda), the daughter of Malcolm and Margaret had married Henry in 1100. Edgar is believed to have travelled at least one more time to Scotland, possibly around 1120. Edgar lived to see the  death of William Adeling, Henry's son and heir, from Margaret, at sea in November 1120. According to William of Malmesbury, who was writing at the time, Edgar was still alive in 1125, and the general consensus that he died then soon after, the location of his grave is unknown. However, there are two curious references to a 'Edgar Adeling' in the Magnus Rotulus Pipae Northumberland (pipe rolls) for the years 1158 and 1167. This could either be the same Edgar, aged around 110 years (though this is unlikely) or it could be a son or someone else known by this name. Howver, Edgar is not known to have ever been married or to have had any children.

Bibliography:

The Ayling Story | Edgar Atheling." The Ayling Story. N.p., n.d. Web. 8 June 2014

.Binns, Stewart. "Stewart Binns on Edgar the Atheling." Historical Novel Society RSS. N.p., n.d. Web. 8 June 2014.


"The House Of Wessex." English Monarchs. N.p., n.d. Web. 08 June 2014.

image Credit goes to Wikipedia


Thursday 29 May 2014

Edgar the Atheling, Part 2: Enemy of William the Conqueror

With the death of Harold Godwinson following the Battle of Hastings, the Witan assembled in London and nominated Edgar king. Both Stigand, Archbishop of Canterbury and Ealdred of York, as well as the two brother earls, Edwin and Morcar (of Mercia and Northumberland, respectively) were there in London  However, as William approached London, Edgar's support started to disappear, with Stigand, Archbishop of Canterbury submitting at Wallingford. With the Conqueror getting ever closer to London, the members of the Witan still in London began negotiations with William, resulting in Edgar being handed over to William at Berkhamsted. Edgar and other English leaders went to William's court in Normandy in 1067. However, when they returned to England, he fled and his mother and sisters fled to the court of Malcolm Canmore III in Scotland. Margaret, a sister of Edgar, (who would become St Margaret) was married to the Scottish King. Malcolm promised to help Edgar gain the English throne. Edgar may have been involved in the failed rebellion of Edwin and Morcar in 1068, but with the Northern Rebellion in early 1069, William's reign over England was indeed threatened.

                                              Victorian depiction of Malcolm and Margaret

When rebellion broke out in Northumberland, Edgar along with other exile rebels, headed back to England from Scotland. Edgar was became the leader or at least the figurehead of the revolt. The rebellion was initially successful, but it was eventually defeated by William at York, causing Edgar once more to return to Scotland (the Anglo-Saxon Chronicle suggests these events happened in 1068, others 1069). In late summer ( most likely, in 1069) a Danish fleet set by Sweyn Estridsson arrived and some more rebellions were sparked. Edgar and some other exiles sailed to the Humber, where they met up with some Northumbrian  rebels and the Danes. They defeated the Normans at York and for a short time took control of Northumbria. However, a small seaborne raid led by Edgar into Lindsey ended in a disaster and he only escaped to with a few followers to rejoin the main army. William then marched into Northumbria and seized York, he bought off the Danes and then devastated the surrounding countryside and also eventually as far as north as the Tees (the notorious Harrying of the North). William, in 1070, took action against and defeated Edgar and some of his followers in a marshy region (perhaps, Holderness) forcing the Atheling once more to flee to Scotland. Edgar remained in Scotland until 1072, however when William invaded Scotland, Edgar was forced to leave, perhaps as part of an agreement. Edgar then took up residence in Flanders, whose count Robert the Frisian was hostile to the Normans. By 1074, Edgar was able to return to Scotland, but he eventually received an offer from Philip I of France, who was at odds with William. He offered him lands and a castle near Normandy, so he could raid the Duchy. He left for France, by ship, but a storm caused his ship to be shipwrecked. Many of Edgar's followers were hunted down by the Normans, however Edgar once more escaped to Scotland with the remainder of his followers. As a result, Malcolm persuaded Edgar to make peace with William and to return to England as William's subject, therefore ending any hope of him gaining the throne. However, this is  certainly not the ending of the Atheling's story.

Bibliography:

"The Ayling Story | Edgar Atheling." The Ayling Story. N.p., n.d. Web. 29 May 2014

.Binns, Stewart. "Stewart Binns on Edgar the Atheling." Historical Novel Society RSS. N.p., n.d. Web. 29 May 2014.

"Britannia: The AngloSaxon Chronicle." Britannia: The AngloSaxon Chronicle. N.p., n.d. Web. 29 May 2014.

Image credit goes to Wikipedia


Tuesday 27 May 2014

Edgar the Atheling, Part 1: Before the Norman Conquest

When people think of the succession crisis in England in 1066, many only recall three of the claimants to the English throne: Harold Godwinson, Harald Hardrada and William of Normandy. Yet, one often forgotten was the closest blood relative to Edward the Confessor, his name being Edgar the Atheling (Atheling meaning belonging to a noble family). Edgar was even proclaimed, though never crowned King of England. Although this article will mainly be focused on Edgar, it would be ignorant  not to acknowledge another often forgotten, claimant to the English throne, Sweyn Estidsson of Denmark, who also had a relatively strong claim.

Edgar the Atheling was born in 1051 in Hungary, his father was Edward the Exile and his mother was Agatha, who was described as a relative to the Holy Roman Emperor. Edward the Exile, was the son of King Edmund II Ironside. Edmund had succeeded Ethelred the Unready as King of England when he died on the 23rd April 1016. However, Edmund was eventually defeated by King Cnut of Denmark and he died on the 30th November 1016 (the circumstances being unknown). John of Worcester suggests that Cnut sent Edmund's sons, Edward and Edmund, to Sweden, where his brother reigned, with the hope of them being murdered. However, the two children were spared and eventually ended up in Hungary. Edward eventually gave birth to Edgar, who he would return to England with in 1057 after being summoned to England in 1057 by Edward the Confessor. It is possible that Edward may have going to be name Edmund his heir, after all he had only recently gained knowledge of his nephew still being alive. However, soon after Edmund arrived in England with his son, he died under unknown circumstances. This left Edgar, Edmund's son as the closest living heir to Edward the Confessor, as Edmund (the son of Edmund Ironside) had died by 1054.Little is known of what happened to Edgar from this point until 1066.

                                              Edgar in an illuminated family tree of Edmund Ironside

When the  Edward the Confessor died in January 1066, Edgar did not succeed him, despite being his closest blood relative (Edward did not have any sons). Instead, the Witenagemot ( an assembly of the ruling class) had elected Harold Godwinson as king. Harold Godwinson was the most powerful noble in England and had considerable military experience, while Edgar was only in his early teens when Edward died and therefore too young to be an effective military ruler. Previous, monarchs had became king at a similar age, such as Eadwig, Edward the Peaceful and Edward the Martyr and Ethelred the Unready had succeeded even at an age significantly younger to Edgar. But, the situation in 1066 was not normal, England faced possible invasions from Norway, Denmark and Normandy and therefore England needed a strong military leader. It then was no surprise that the Witan elected Harold Godwinson as King instead of the young Edgar (who one may assume was most likely considered at the least). However, with the death of Harold Godwinson at the Battle of Hastings in October 1066, Edgar the Atheling was once again a prime candidate for becoming King of England.

Bibliography:

"The Ayling Story | Edgar Atheling." The Ayling Story. N.p., n.d. Web. 27 May 2014

.Binns, Stewart. "Stewart Binns on Edgar the Atheling." Historical Novel Society RSS. N.p., n.d. Web. 27 May 2014.

"Edgar the Aetheling Claim." Edgar the Aetheling Claim. N.p., n.d. Web. 27 May 2014.

Image Credit goes to Wikipedia


Tuesday 22 April 2014

Cola di Rienzo: An Extraordinary Medieval Leader

Cola di Rienzo was born in Rome in 1313. He claimed to be the son of the Holy Roman Emperor, Henry VII. However, his origins were more humble, his father a tavern-keeper and his mother a washer-woman. His early years were spent at Anagni an he devoted his time to the study of the ancient Rome, in the ancient writers of Livy, Valerius Maximus, Cicero, Seneca, Boethius and the poets. This filled him with determination to restore Rome to its former greatness and power, this was only fuelled by his desire to avenge his brother who had been killed by a noble. He returned to Rome as a student at the age of 20 and in 1343 he was sent on an errand to Pope Clement VI at Avignon (it was the time of the Avignon Papacy/ the Babylonian captivity), where he fulfilled his duties with ability and success. He was eventually appointed notary of the Roman civic treasury by the Pope and returned to Rome in 1344. He then began to plot a revolution that would return the city of Rome to its former glory. After, three years of working towards his goal, including by gaining supporters, on the 19th May 1347, heralds invited the people to the Capitol (Capitoline Hill) and on May 20th, Whit-Sunday, the meeting was held, where he was given unlimited power and authority, a few days later Rienzo took the title of tribune.

                                       Rienzo vowing to avenge the death of his younger brother

His authority was quickly accepted among most in Rome, his reign was immediately was marked with order and justice, compared to the previous disorder. In July, he proclaimed the sovereignty of the Roman people over the Empire and at first set himself with the task of restoring Rome's authority over the other Italian cities.  On August 1st 1347 he conferred Roman citizenship on all the cities of Italy and and proceeded to prepare for an election of a Roman Emperor of Italy the following year. On the following day the festival of the unity of Italy was celebrated. However, none of this had any political result. However, he was recognised by Joan of Naples, who and her bitter foe the King of Hungary asked for protection and aid. On August 15th he was crowned tribune.

However, his reign was soon to come to an end.. He then  seized and soon released Stefano Colonna and and some other barons. The Pope and the Emperor were both offended by his proposal to set up a new Roman Empire, and in October Clement gave power to a legate to dispose him. The exiled barons soon gathered troops and war began in the neighbourhood of Rome, but with aid from Louis I of Hungary and others, the rebels were defeated on the 20th November 1347. Although, he did not take part directly in the fighting, his most distinguished  foe , Colonna was killed. However, he was eventually declared a criminal, heretic and pagan by the Pope. He fled Rome and abdicated on December 15th 1347, following being terrified by a slight disturbance. He sought refuge in Naples, but quickly left and spent two years in an Italian mountain monastery.

Emerging from solitude, Cola journeyed to Prague in 1350, throwing himself on the protection of the Emperor Charles IV, denouncing the Pope's temporal power. Charles kept him prisoner for a year in the fortress of Raudnitz, then handing him over to Pope Clement. In August 1352, he appeared in Avignon and although he was tried by three cardinals and sentenced to death, the judgement was not carried out. When Clement died in December 1352, he had the chance to gain his freedom, when his successor Innocent VI saw him as a tool to strike at the baronial rulers of Rome. He was appointed the title senator and with a Papal legate he entered Rome in August 1354 and quickly regained his position and power. This term was to be even shorter than his first.

Having besieged the fortress of Palestrina, he returned to Rome where he treacherously seized the mercenary Giovanni Moriale and put him to death. Through this and other cruel and arbitrary acts he quickly lost the favour of the people. On October 8th 1354, Cola addressed some of the aroused people, but the building he was in was set on fire and as he tried to escape he was murdered by the mob.

Bibliography:

The Editors of Encyclopædia Britannica. "Cola Di Rienzo (Italian Leader)."Encyclopedia Britannica Online. Encyclopedia Britannica, n.d. Web. 22 Apr. 2014.
"Cola Di Rienzi." CATHOLIC ENCYCLOPEDIA:. N.p., n.d. Web. 22 Apr. 2014.

Image Credit goes to Wikipedia


Wednesday 26 March 2014

Anglo-Saxon Kings of England: King Offa

King Offa (born 730) ruled Mercia from 757 until his death in July 796 and was the first known as 'King of the English'. When his cousin Aethelbard was assassinated he seized power during a period of civil war, after defeating Aethelbards' intial successor Beornred. Throughout his reign Mercia became  the most powerful Kingdoms in Anglo-Saxon England, he ruled over  Kent, Sussex, East Anglia and the Midlands. Furthermore, he married his daughters to the Kings of Northumbria and Wessex. He led a successful campaign against the Hestingi. The Anglo-Saxon Chronicle state he fought the inhabitants of Kent in 776 at Otford. Although, it does not state who won the battle it is presumably, the Mercians. There is no evidence for Offas's success over the Kentish until 785. Offa also lead a successful campaign against the West Saxons at Besington in Oxfordshire.

 During Offa's reign the English penny (silver) was introduced. Offa also had diplomatic relations with Charlemagne. The great European leader proposed that one of Offa's daughters marry one of Charlemagne's sons, However, diplomatic relations broke down when Offa also suggested that his son Ecgfrith should marry Charlemagne's daughter Bertha. Charlemagne, outraged, ended contact with Britain and forbid any English ships to dock at his ports. Eventually, diplomatic relations were restored, although they had not improved by the end of 790. Relations between Offa and Pope Adrian I were strong, in 792 he visited Rome itself to strengthen links with the Papacy. He granted the Pope more control over the church, while the Pope allowed the creation of the archbishopric of Lichfield, this temporary change freeing the Mercian Church from the authority of the Archbishop of Canterbury.

Offa was frequently in conflict with the various Welsh Kingdoms, a key result of this was the building of Offa's Dyke. It roughly follows the traditional boundary of England and Wales, running, although not continuously, from the Dee estuary in the north to the river Rye in the south. This frontier barrier (a ditch and bank) ran for 149 miles and is a legacy of the King who ruled a large portion of England..

                                                                         Offa's Dyke


Bibliography:

The Editors of Encyclopædia Britannica. "Offa (Anglo-Saxon King)." Encyclopedia Britannica Online. Encyclopedia Britannica, n.d. Web. 26 Mar. 2014.

"King Offa." King Offa. N.p., n.d. Web. 26 Mar. 2014

"Offa (r. 757-796)." The Official Website of the British Monarchy. N.p., n.d. Web. 26 Mar. 2014.

"Offa's Dyke." Offa's Dyke. N.p., n.d. Web. 26 Mar. 2014

Image credit goes to Wikipedia


Sunday 2 March 2014

The Shortest War in History: The Anglo-Zanzibar War

The Shortest War in History

The Anglo-Zanzibar, fought on the 27 August 1896, is thought to be the shortest war in history lasting around only 40 minutes. The war was a result of the death of the pro-British Sultan Hamad bin Thuwaini on the 25th of August. The sultans nephew Khalid bin Bargash seized power in a coup following his death. Bargash assembled 2,800 men to protect his position. The British however favoured Hamud bin Muhammad, who was more pro-British. On August 26th Bargash fortified the palace and. The HHS Glasgow, the Sultan's yacht, was anchored in the harbour nearby. The British quickly assembled five cruisers in the harbour. At 8.00 am on the 27th August an ultimatum was issued to the sultan, to leave the palace in one hour or hostilities would commence. With the situation unresolved, the British led by General Lloyd Matthews, began firing on the palace.

The British ships quickly sank the Glasgow. The sultan's artillery consisted of several Maxim machine guns, a Gatling gun, a 17th-century bronze cannons and 2 twelve-pounder field guns. However, the palace was pounded enough to force Bargash to flee. Bargash sought asylum in the German consulate. The British demanded that the Germans handed over Bargash. However, any international incident was avoided when Bargash escaped to sea on October 2nd 1896. With Bargash removed Hammud bin Muhammad was put into position as ruler, he was mainly a British puppet, who ruled until 1902 and ended slavery in Zanzibar. Bargash was finally captured by the British in 1916.

Image Credit:
http://upload.wikimedia.org/wikipedia/en/8/8a/Zanzibar_palace_after_low.JPG
Sources:
http://militaryhistory.about.com/od/battleswars1800s/p/anglozanzibar.htm
http://news.bbc.co.uk/dna/place-lancashire/plain/A19142282

Wednesday 26 February 2014

Beowulf and the Battle of the Ice of Lake Vänern

The Battle of the Ice of Lake Vänern

Beowulf was a legendary Geatish hero, who had a Norse epic poem named after, he participated in this battle, which was not only referred to in the poem, but also in the Norse Sagas. The battle was the result of Eanmund and Eadgils, fleeing to Geatland to seek refuge after their father King Ohthere had died and his brother Onela had seized the Swedish throne. Ohthere is thought to have  been the first historical King of Sweden. As, Ohthere's sons had fled to Geatland, Onela attacked the Geats. Beowulf, decided to help Eadgils gain the Swedish throne after the Geatish King Heardred was killed. Originally, Beowulf had been offered kingship over Geatland by Queen Hygd, after King Higlac's death, but he had declined in favour of Heardred. However, now Heardred was dead Beowulf was named King. During the battle, Onela was killed and therefore Eadgils became King of Sweden.

                                                      The first folio of the poem Beowulf
The battle is most likely a historical event, as it is not only mentioned by the 3,000 line long poem, but it is also mentioned in several other Scandinavian sources, such as those of Snorri Sturluson. Beowulf itself is the longest poem in Old English.  During the battle, the combatants have been described as being mounted, however later Anglo-Saxon and Viking told that the legend was fought on foot. Finally, Beowulf is said to have ruled the Geats for 51 years in total.

Image Credit:
http://en.wikipedia.org/wiki/File:Beowulf_Cotton_MS_Vitellius_A_XV_f._132r.jpg
Sources:
http://www.bl.uk/onlinegallery/onlineex/englit/beowulf/

Sunday 16 February 2014

Greatest Naval Battles

Greatest Naval Battles

Throughout, history there have been many times when man has took their conflicts onto the sea. Many of these battles have certainly had some influence on history and war, whether decisive or not. Below a brief overview of some of the greatest naval battles of all of history shall be given.

The Battle of the Delta                                                                         


Ramesses III and Egypt were in danger from the mysterious Sea Peoples. The Sea Peoples had plundered and destroyed the Hittite Empire's Capital Hattusha and their endeavours were leading to the collapse of the Bronze Age. After defeating them in a land battle in Syria, Ramesses returned to Egypt ready for the Sea People's attack. Ramesses lined the shores of the Nile Delta with archers and lured the Sea Peoples into the Delta, where ships also lay in wait to ambush. Archers from the ships and shore attacked the Sea Peoples, leading to their defeat. The battle (1178 BC or 1175 BC) secured Egypts future from the Sea People.

The Battle of Actium
The Battle of Actium was a decisive battle in the Final War of the Roman Republic, which  resulted in the formation of the Roman Empire and Octavius becoming the first Roman Emperor. When the senate declared war on Egypt, Marc Antony pledged his support to Cleopatra. The fleet loyal to Octavius consisted of  250 galleys, whereas the opposition's consisted of around 290 galleys. The battle (31 BC) ended when Cleopatra pulled her forces out (various reasons have been suggested, for example the tension created by the actual battle- as the Admiral Quintus Dellius, had defected to Octavius and revealed Antony's plans to him.). Antony then soon pulled out himslef, leaving 3/4 of his fleet behind. Regardless, this battle meant many of Antony's men deserted him. Ultimately, leading to his demise, the Roman annexation of Egypt and the first Roman Emperor.
The Battle of Lepanto


In 1571, the Christian powers in the Mediterranean had assembled a fleet to confront the powerful Ottoman Empire. The Holy League fleet included ships from Venice, Spain, Genoa, the Papacy and the Knights of Malta, Savoy, Tuscany and Urbino. The Holy League had 212 ships, whereas the Ottomans had 251 ships. The two flag ships soon found themselves in battle with each other and eventually Ali Pasha's ship was took with the Ottoman commander being killed in the process. Ali Pasha's death (against Don Juan's wishes) reduced the Ottoman's morale (his head was decapitated and ton a pike), eventually causing many of them to flee. The battle helped to stop the Ottoman influence in the Mediterranean growing.

The Battle of Tsushima 


During the Russo-Japanese War, The Russian Baltic fleet was sent to help relieve the blockade of Port Arthur , which the Japanese had besieged. However, on the 2nd January 1905 Port Arthur had fell, so the fleet tried to reach Vladivostok instead. The fleets would engage in the straits of Tsushima, The Russian ships were in poor condition, made even worse by the long journey ( the British had refused them access to the Suez Canal). Fouling had made the Russian ships less manoeuvrable, therefore Admiral Togo used this to his advantage. The Japanese won, losing only 3 torpedo boats (they had had 89 ships,  37 being the relatively small, but dangerous torpedo boats. The Russians lost 21 of their 28 ships. The battle was a humiliation, as a Asian nation had defeated a great European great power and along with the Siege of Port Arthur and the Battle of Mukden, it had ruined Russia's reputation. It could be argued all this parlty helped in causing the 1905 revolution, which boiled tension over into the 1917 revolution, which would forever change Russia's history.

Battle of Jutland

Th battle of Jutland is considered the only major naval engagement of WWI and is considered the largest naval battle ever in terms of tonnage.  In 1916 the British had effectively blockaded much of the German coastline, however. the Admiral von Poul was replaced by the more aggressive Admiral von Scheer.  In May, Scheer had had ordered  Adiral von Hipper to move along the Danish coastline,  Admiral Jellicoe in Rosyth saw this as a provocation and put the Grand Fleet to sea. On May the 31st the battle began. The British lost more ships (14 of 151 combat ships, whereas the German had lost less capital ships- however, in total they lost  11 of their 99 ships). Despite, the German successes they were never in a position during WW1 to threaten the North Sea again.

Image Credit:
http://en.wikipedia.org/wiki/File:Seev%C3%B6lker.jpg
http://en.wikipedia.org/wiki/File:Castro_Battle_of_Actium.jpg
http://zh.wikipedia.org/wiki/%E5%8B%92%E7%8F%AD%E9%99%80%E6%88%B0%E5%BD%B9
http://portsmouthpeacetreaty.org/process/war/images/44-tsushima-battleLg.jpg
http://en.wikipedia.org/wiki/File:HMS_Lion_(1910).jpg
Sources:
http://riversfromeden.wordpress.com/2011/08/11/the-battle-of-the-nile-delta-1178-b-c/
http://ehistory.osu.edu/world/articles/ArticleView.cfm?AID=16
http://militaryhistory.about.com/od/navalbattles14011600/p/lepanto.htm
http://www.navyhistory.org.au/the-battle-of-tsushima-1905/
http://www.historylearningsite.co.uk/battle_of_jutland.htm